
Office Chairs: Your Back Will Thank You
Invest in your health with office chairs designed by experts to prevent back pain and improve posture...
12 min

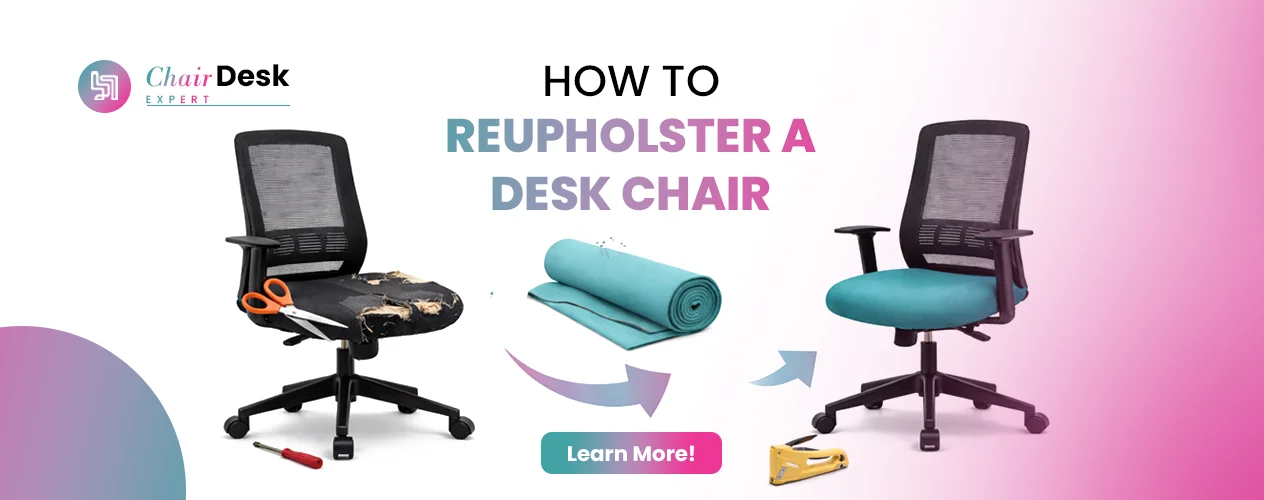
Office chairs are the first thing to consider when setting up your office. A well-maintained office chair with a fresh look improves your posture and gives the office a new look. With time, the bonded leather cover on the office chair is fading. It will affect your chair’s appearance.
We will describe simple techniques to reupholster your office chair so you can save money without compromising on your chair. This guide will focus on How to reupholster a desk chair easily.
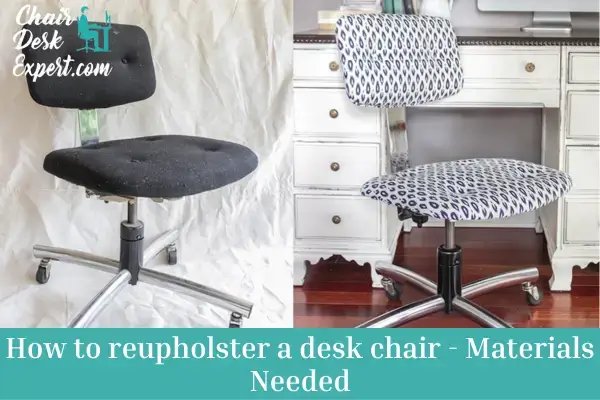
To embark on this reupholstering journey, gather the following materials:
Cost Considerations:
If you already have the necessary tools, the fabric, thread, and decorative trim will cost approximately $25. Additional costs may arise if you need to purchase tools, but keep in mind that the staple gun, pins, and upholstery needles can be reused for other projects. The staple lifter is optional, and alternatives like pliers or an office staple remover can be used.
The disassembly process will vary depending on your chair type. For the chair, four screws underneath needed removal to detach the wheels. Save any Allen wrenches used during the initial chair assembly for potential future disassembles.
Follow these steps for a successful reupholstering process:
Use suitable tools like Allen wrenches to remove the screw. Keep your tools safe and come along with furniture for future use.
Save Allen wrenches from initial furniture assembly projects; they might be needed for disassembly. Ensure you have the right size for your chair.
Keep all tools, screws, and small parts in a container to prevent them from getting lost. This is crucial for multi-day projects to ensure everything is accounted for.
If your chair has wheels, use the Allen wrench to remove the screws underneath. Save the screws in the container for reassembly.
Some chairs may have helpful labels on the inside, indicating specific parts. Take advantage of these labels for easier reassembly.
If your chair lacks labels, take plenty of pictures before disassembling. This documentation ensures you have a reference for how it looked before the process.
For parts like arms, check for decorative screw covers. These can usually be easily removed by wedging a fingernail underneath.
Once removed, access the screws holding the arms in place.
Identify and document the number and location of screws holding arm cushions. In this case, there were three screws holding each arm to the seat cushions.
Look underneath the arms for additional screws holding cushions, and remove them.
Taking your office chair apart requires careful attention to detail and organization. By following these steps, you can successfully disassemble your chair for any necessary repairs or reupholstering projects. Remember to store all tools and screws securely for the reassembly process.
Your finished cushion is now securely reattached to the arm, completing the reupholstering process. Enjoy the refreshed appearance of your office chair!
Since the seat cushions were tufted, tacking down fabric in the four defined areas of the rectangle in the middle is crucial. This prevents the fabric from ripping over time due to stretching.
Place the fabric over each cushion, mark the spots to be tacked down with pins, and use a curved upholstery needle with matching thread to sew through each spot.
Hand tacking may not be very noticeable but aids in draping the fabric nicely. It ensures the fabric stays securely in place over time.
For the bottom seat cushion, pull the fabric to the back and pin it in place before stapling.
Trace the outline of each seat cushion roughly onto the fabric, leaving about 5-6 inches of excess around. This ensures there’s enough fabric to cover the sides and reach the back.
Pleat the fabric evenly around each corner, pin close to the edge of the back, and leave pins in while stapling after pulling the fabric tight.
Each seat cushion may have screw holes on the side, which need to be cut out after adding the fabric. Precision is not critical here, as these cuts will be covered when reattaching the arms.
The top seat cushion, being visible, requires more care in reupholstering, as most of this section may be padded, making staples prone to pulling out easily.
Carefully fold the fabric along the edge of the previous seam, ensuring a neat and concealed appearance.
If the back of the cushion is in good condition, you may choose to leave it as is.
Pin the fabric in place slightly overshooting the previous seam and use a curved upholstery needle with coordinating thread to sew it in place.
Ensure the sewing is neat and secure, especially since this part of the cushion will be visible.
After sewing, assess the appearance. Depending on your preference, you might choose to leave it as is or consider additional finishing touches.
This is all about How to reupholster a desk chair. The process is easy and brings new life to your office chairs. Follow the process, select a suitable fabric, disassemble the chair, and then skillfully sew the fabric. With this process, you make your chair like a new one. It is a cost-effective solution as compared to buying a new one.
Yes, it’s surprisingly easy to reupholster a desk chair, and doing so can give your chair a total makeover, whether the fabric is deteriorating or you simply want a fresh, vibrant look.
Reupholstering a chair is considered one of the simplest DIY tasks, especially for beginners. If the chair’s structural components are in good condition, changing its look can be done with minimal effort.
Yes, it’s worth reupholstering an office chair if the upholstery is worn out. Refurbishing the fabric not only enhances aesthetics but also improves comfort and hygiene, providing a fresh and inviting appearance to your workspace.
As a general rule, using 54″ wide fabric, 3/4 yard is sufficient for two chairs. The fabric requirement increases proportionally based on the number of chairs you plan to reupholster.
Yes, fabric office chairs offer a balanced combination of comfort, style, and functionality. They are an excellent choice for various work environments, promoting productivity and overall well-being, whether used in a home office or a professional setting.
Expert reviews, guides, and insights for your perfect setup


